Not too long ago I came across a post from Anabelia Craft Design offering a delightful Stars Garland (free pattern here). I tried her pattern and it came out wonderfully, but I was really looking for a dainty snowflake pattern. After playing a bit with Anabelia's design, I was successful!

I made the snowflakes with an D 3.25mm hook and Bernat Handicrafter acrylic size 5 yarn. (This yarn is discontinued now but Hobby Lobby still has their version. I like it because it has a nice sheen.) Of course you could use cotton crochet thread and a smaller hook to make tinier snowflakes, or a larger crochet hook and fingering/sport weight yarn to increase the size, but if using a larger weight yarn I would suggest a cotton or cotton blend because it'll block better. At this point I haven't added any extra decoration, but I certainly think a few rhinestones, sequins, and/or glitter fabric paint would be nice. The blocked snowflake is 3 1/4" in diameter.
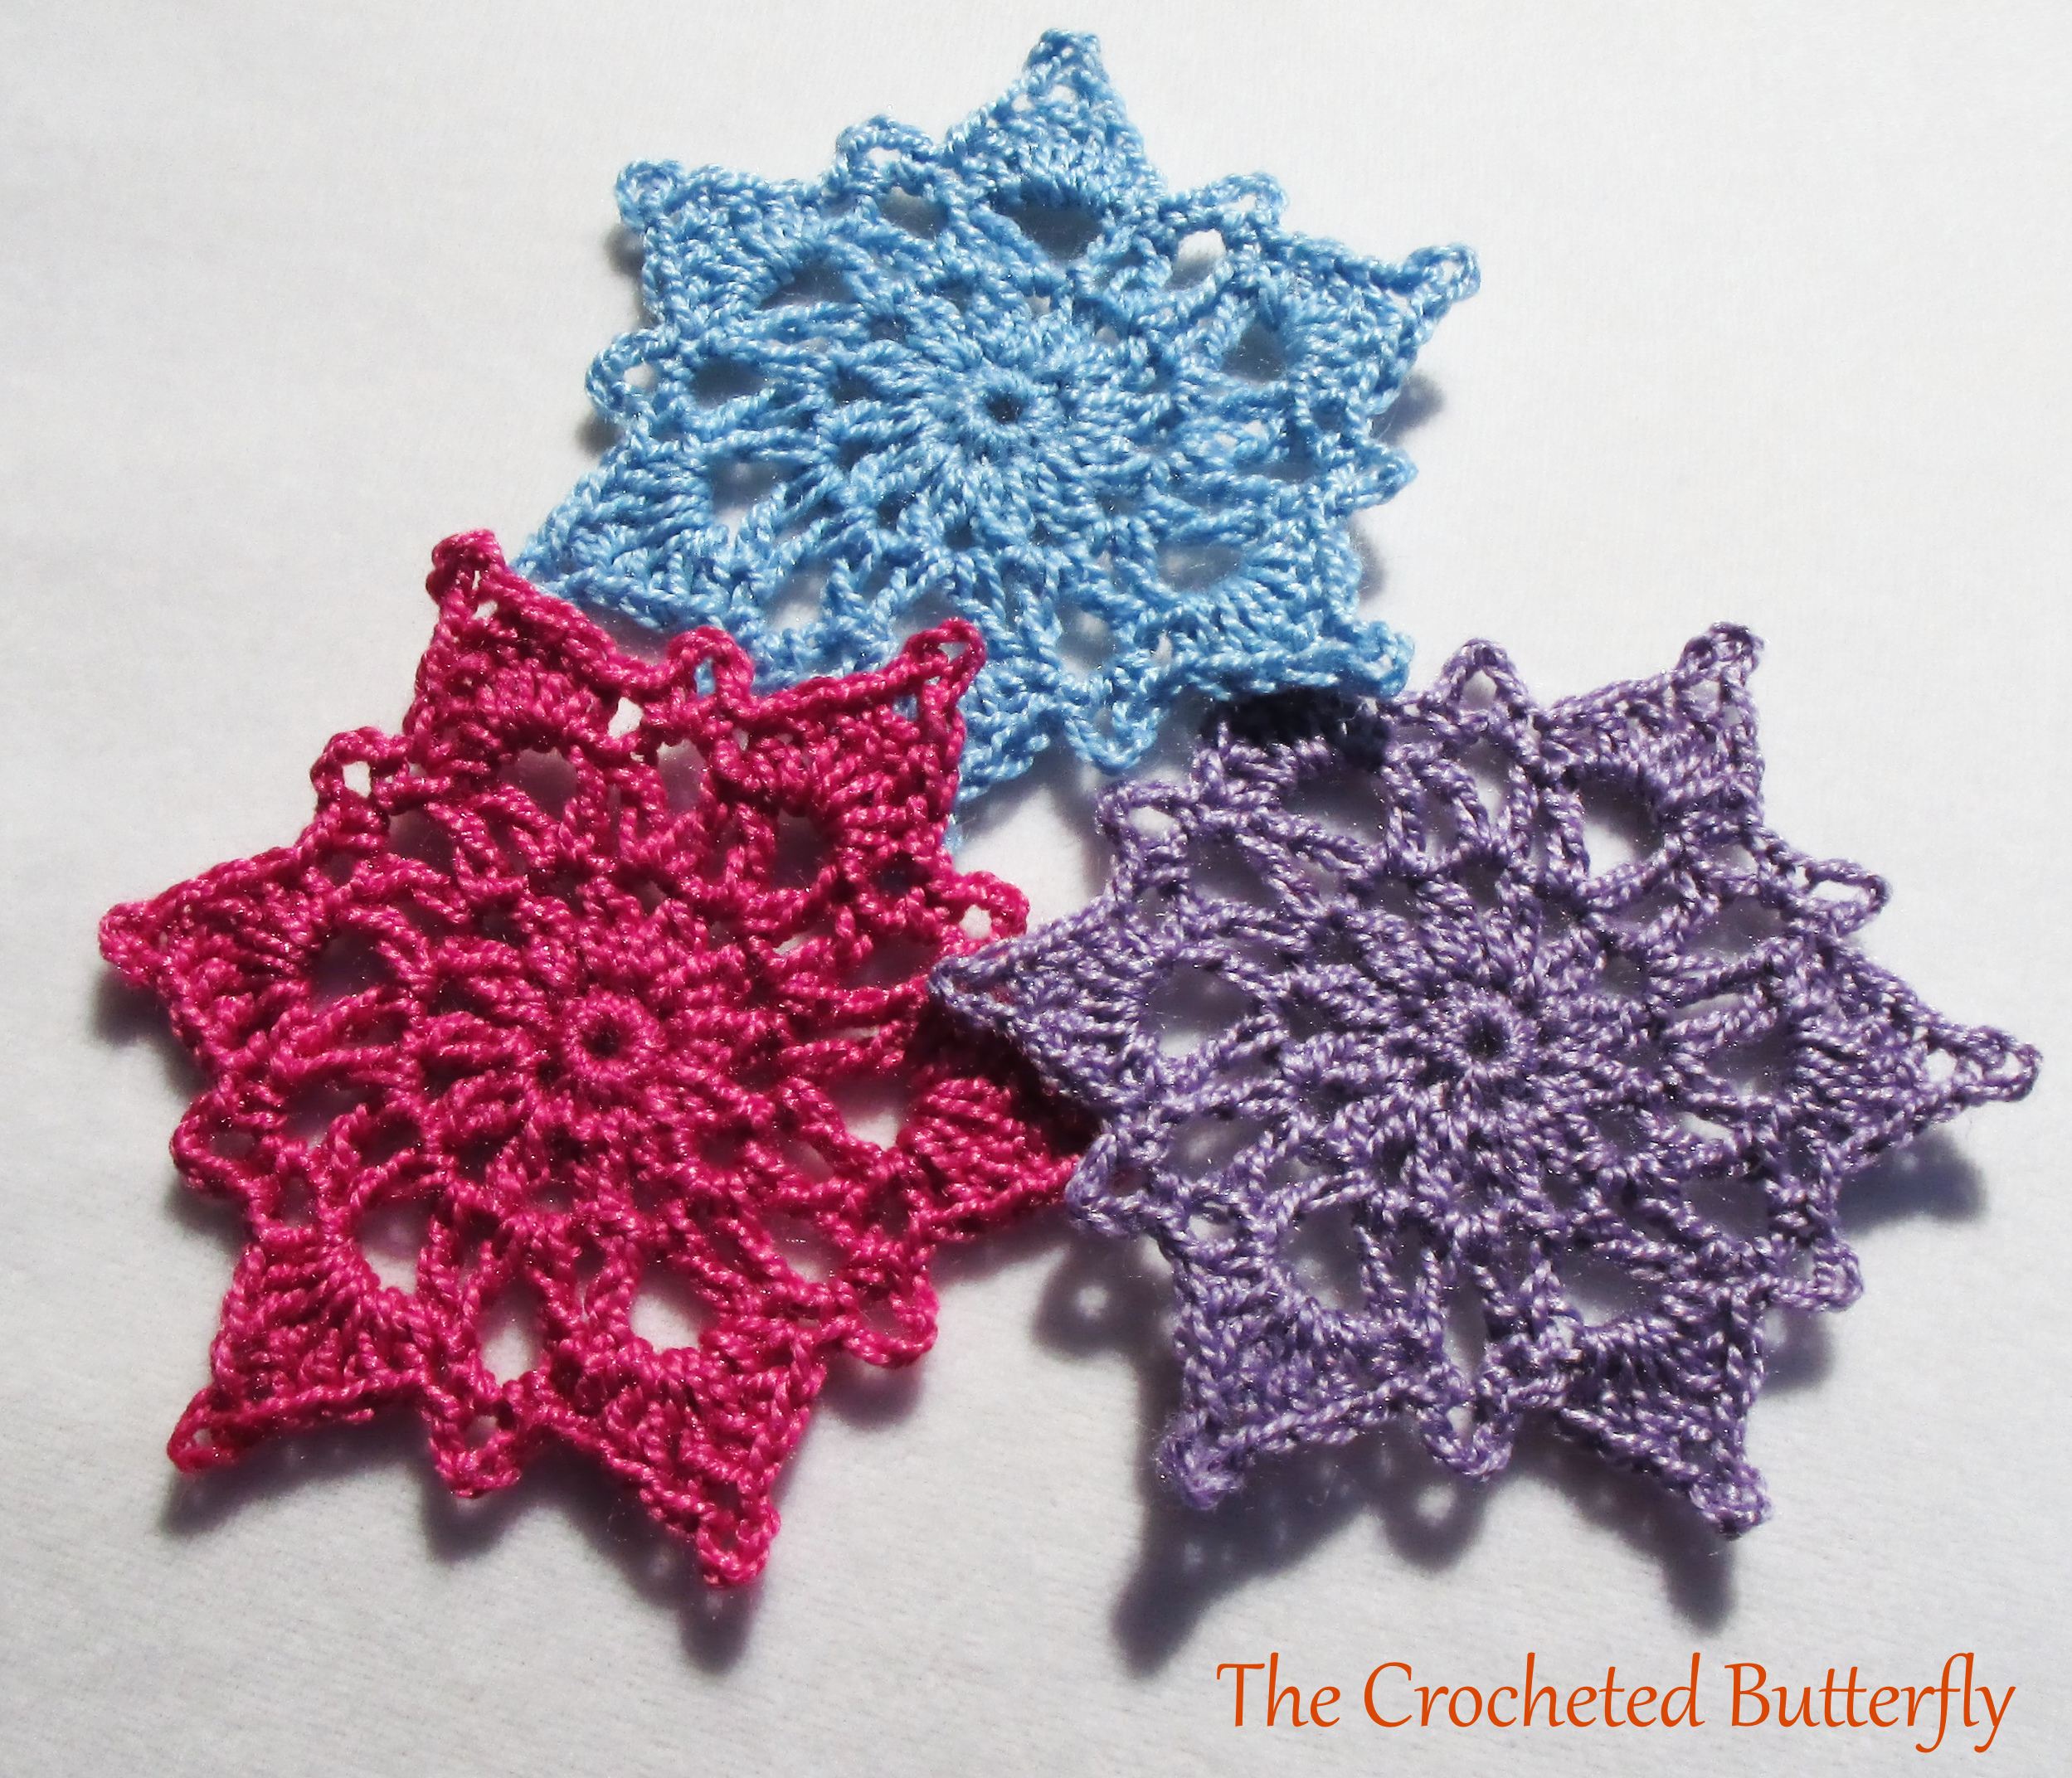
These snowflakes would make a great garland, just like the stars in Anabelia's design. They'd make cute ornaments, of course, but I could see these as tag decorations or as a wonderful embellishment to Christmas/holiday cards. Perhaps as a necklace or pin, or hat, scarf, or hair decoration. Let your imagination fly!
Sweet Little Snowflake Pattern / Easy skill level
Bernat Handicrafter Acrylic yarn size 5, or your choice of thread/yarn
Size D 3.25mm crochet hook (or size for your yarn)
Materials for blocking plus some form of starch.
Stitches Used - Ch - chain; Sc - single crochet; Dc - double crochet; Sl St - slip stitch; 2 Dc Tog - two double crochet stitches together; Sp - space; St - stitch; Hdc - half double crochet; Trc - triple crochet; FO - finish off
Snowflake is worked in rounds with right side always facing you.
Rnd. 1 - Work 12 scs in a magic circle. Sl st in 1st sc.
Rnd 2 - Ch 2, dc in same stitch (counts as 2 dc tog). Ch 3. *In next st work 2 dc tog, ch 3*. Repeat * to * around to last ch 3 - sl st in top of ch 2 at start of this round.
Rnd 3 - Sl st in ch 3 sp, ch 6 (counts as 1 dc and ch 3). Dc in same ch 3 sp. Work dc, ch 3, dc in each ch 3 sp around. Sl st into 3rd ch of ch 6 at beginning of this round.
Rnd 4 - *In the next ch 3 sp work - 1 hdc, 2 dcs, 1 trc, 3-ch picot on top of trc, 2 dc, 1 hdc. In next ch 3 sp work sc, ch 3, sc.* Repeat * to * around. Sl st in 1st hdc and FO.
After I was done, I made tiny knots with my tails on the backside of the snowflake and put a dot of glue to secure them, then cut off any excess yarn. I dampened them with water and painted a light coat of commercial fabric stiffener on the back only. I had drawn 3 1/4" circles that had been divided into 6 equal parts on plain white paper. Using a bulletin board or blocking mat, lay the paper down and cover with plastic wrap. Pin into place to hold. Using the circles and lines as guides, pin the snowflakes to block (making sure you use rust-proof pins). Let dry and decorate!

I made the snowflakes with an D 3.25mm hook and Bernat Handicrafter acrylic size 5 yarn. (This yarn is discontinued now but Hobby Lobby still has their version. I like it because it has a nice sheen.) Of course you could use cotton crochet thread and a smaller hook to make tinier snowflakes, or a larger crochet hook and fingering/sport weight yarn to increase the size, but if using a larger weight yarn I would suggest a cotton or cotton blend because it'll block better. At this point I haven't added any extra decoration, but I certainly think a few rhinestones, sequins, and/or glitter fabric paint would be nice. The blocked snowflake is 3 1/4" in diameter.
These snowflakes would make a great garland, just like the stars in Anabelia's design. They'd make cute ornaments, of course, but I could see these as tag decorations or as a wonderful embellishment to Christmas/holiday cards. Perhaps as a necklace or pin, or hat, scarf, or hair decoration. Let your imagination fly!
Sweet Little Snowflake Pattern / Easy skill level
Bernat Handicrafter Acrylic yarn size 5, or your choice of thread/yarn
Size D 3.25mm crochet hook (or size for your yarn)
Materials for blocking plus some form of starch.
Stitches Used - Ch - chain; Sc - single crochet; Dc - double crochet; Sl St - slip stitch; 2 Dc Tog - two double crochet stitches together; Sp - space; St - stitch; Hdc - half double crochet; Trc - triple crochet; FO - finish off
Snowflake is worked in rounds with right side always facing you.
Rnd. 1 - Work 12 scs in a magic circle. Sl st in 1st sc.
Rnd 2 - Ch 2, dc in same stitch (counts as 2 dc tog). Ch 3. *In next st work 2 dc tog, ch 3*. Repeat * to * around to last ch 3 - sl st in top of ch 2 at start of this round.
Rnd 3 - Sl st in ch 3 sp, ch 6 (counts as 1 dc and ch 3). Dc in same ch 3 sp. Work dc, ch 3, dc in each ch 3 sp around. Sl st into 3rd ch of ch 6 at beginning of this round.
Rnd 4 - *In the next ch 3 sp work - 1 hdc, 2 dcs, 1 trc, 3-ch picot on top of trc, 2 dc, 1 hdc. In next ch 3 sp work sc, ch 3, sc.* Repeat * to * around. Sl st in 1st hdc and FO.
After I was done, I made tiny knots with my tails on the backside of the snowflake and put a dot of glue to secure them, then cut off any excess yarn. I dampened them with water and painted a light coat of commercial fabric stiffener on the back only. I had drawn 3 1/4" circles that had been divided into 6 equal parts on plain white paper. Using a bulletin board or blocking mat, lay the paper down and cover with plastic wrap. Pin into place to hold. Using the circles and lines as guides, pin the snowflakes to block (making sure you use rust-proof pins). Let dry and decorate!