Showing posts with label patterns. Show all posts

Thursday, August 16, 2018

Just Buy the Pattern!

You know, they say a little knowledge is a dangerous thing. And sometimes life just makes sure I don't forget it.

I've been crocheting fairly consistently now for about 30 years and I consider myself at an intermediate level, although I've certainly not had much of any experience making clothing. You know, the kind that actually has to fit. So every now and then I'll be perusing Pinterest and I'll find a photo of an item that I fall in love with, but then I find out I'd have to pay for the pattern. Since I have a very small budget, I try to be frugal. And sometimes I'm arrogant (and silly) enough to think that I can just figure out the pattern on my own.

Such was the case of the Metro Kerchief by Yuliya Tkacheva. Even though I am a lace fan at heart, occasionally when I see a beautiful geometric pattern I fall in love. And I fell hard for this one. But since my budget is tight, I thought (after looking very carefully at the scarf) that I could figure it out on my own. HA!

Metro Kerchief by Yuliya Tkacheva


First off, you have to be careful to choose a yarn that has quite a bit of body to it because a soft yarn won't hold the design. That was my first mistake, so I had to start over with another yarn. Next, after you figure out how to do the pattern, you have to figure out the correct increases/decreases, otherwise you will end up with either a VERY long scarf, a very short scarf, or a very lopsided scarf.

I won't bore you will all the details, but this scarf took me almost a month to finally get right (and with a lot of mathematical help from my husband, too). Looking back on this now, that's totally insane. Of course, when I started out I had no idea it would be so difficult for me (that arrogance again!), but at least the experience has taught me a lesson. Unless an item is super-super easy, JUST BUY THE PATTERN!

                    The Urban Kerchief, now available in my Bonanza Shop

I have since completed my version of this scarf, and even though it took me forever, I am very happy with how it turned out. It is currently available for sale at my Bonanza booth - only $21.99 and free shipping! (Christmas is coming faster than you know....)

Friday, July 13, 2018

I've Been Busy

I have totally fallen off the track with posting as I had promised myself at New Year's. I went to a wonderful 4th of July/family reunion party and had a great time, but within a couple days the weather went to 112 degrees and I didn't handle it well. (Neither did several of my plants, and I am afraid I've lost at least two of them.) Then last Tuesday my husband went in for surgery (all is well!), but I had to get up at 3:30 am to get ready to leave with him, which really threw my routine in a tizzy. Silly me, I brought a shawl to work on while I was waiting, but I was so tired I ended up having to rip out all that I had done. Oh well, it kept me busy. I've since caught up on my sleep and I am back with the living now!

My husband was just recently notified that his family is going to have a new addition. The nephew and his wife had a gender reveal at the July 4th party - it's a girl! So if course that means anything I was currently working on or planning to work on has been set aside for now. There are so many wonderful things to crochet for babies - it's so hard to choose! However, I remembered a particular doll that I had seen a while ago that I fell in love with, but it was a paid pattern so I took a pass. But now I have the perfect excuse for buying it! So I did. It's called "Cuddle-baby - amigurumi doll" by Lilleliis and it cost about $4.68 in US dollars (4 Euros). The pattern is well written and easy to follow; it was me who screwed up, so of course it took forever to make.

Cuddle-Baby - Amigurumi by Lilleliis

My suggestion is to make sure you have all the same weight yarn to make this doll with. I thought I did, but it didn't take me too long to realize I didn't. You see, I'm still trying to keep with using my stash, so I worked with what I had. I started with the head and then went on to the body. The yarn I used for the head was at least a DK and the body was definitely sport weight. The head was huge! So I had to unravel half the head and figure out how to make it smaller, which was time consuming. Then I realized I hadn't worked the invisible decrease correctly on the body, which left odd little indents (they didn't show until I stuffed it). I tried to fix it with a needle and thread, but it didn't work. So I had to redo the body. Then I realized one of the hands was bigger than the other, but I was able to fix that with needle and thread. Geez, you'd think I was a novice crocheter for as much as I messed up!

I did decide to embellish a little, so I gave the hat a crab stitch edging with a pink whipstitch in between the grey stitches, and I added a triple heart applique to the body. Even though this little doll ended up taking a lot more time that it should have, I'm still happy with the outcome. I may add the stitching around the wrists and ankles, though - it does give a more finished look. That is, of course, if I can keep myself from starting the newborn booties, baby blanket, 12M sweater...well, you get the idea!

My version - not a bad runner up, hey?  

There is one thing I found out that made me sad, though. While I was looking for the pattern on Ravelry, I found another person's version of the same pattern for sale. It wasn't done nearly as well, and now I can't seem to find it. I can only hope that the original designer found it and told her to take it down. The nerve of some people! Another person was trying to crochet this doll from the picture (hadn't bought the pattern) but was having problems figuring out the arms and legs, so she was asking for the directions on the pattern's forum! The designer replied that what she was requesting was illegal and she was shocked that someone could do such a thing. Listen, I've made things from photos, too, but  I would never have the gall to go on the paid pattern's site and ask for free directions! So sad this stuff goes on. And one word to the wise - unless a pattern is VERY simple, you're going to spend A LOT of time figuring it out on your own. Trust me - I know! So you'd better think twice if it's really worth saving a few bucks, IMO.

Till next time, keep on hookin'!


Friday, May 4, 2018

It's About Time!

I've been a little sluggish with my crocheting lately (and my posts!). I needed to take some pics too, and of course "sunny" California decided to be grey and drizzly for the past few days. However - TA DA - I have a few new things to show you. One item isn't totally new, but I've finally completed it and have the pattern available now in my store, which you can find here. This is the afghan I mentioned in an earlier post, and I've named it Aqua Dreams. The Caron Simply Soft yarn is so pretty and the sheen is really nice. I was very angry at myself for making my traditional mistake of crocheting the beginning rows loose and tightening my tension as I go along - yes, I did it again - but I was able to work it all out with the single crochet/crab stitch border, so everything is fine now. And I am very proud of myself for using up an additional 10+ skeins of my stash!

Aqua Dreams Afghan


 I was so happy with the way the Caron yarn looked that I decided to make another item with it - a long cowl with a lacy edging that you can double loop for added warmth. That's still on the blocking mat, so you'll get to see it in my next post.  I've also finished my version of the Metro Kerchief by Yuliya Tkacheva. I didn't design these two items, so they'll be going in my store as 'products for sale', a new category I'll be adding shortly. I've also designed a scarf/shawlette, I'm working on a summer cowl, and I've finished my mom's Mother's Day present, but I'll have more on those later. By George, i think I'm out of my slump!

My version of the Metro Kerchief
     Till next time, happy crocheting!                                

Wednesday, January 31, 2018

Whorled Crochet Hook Organizer

While perusing the internet, I saw the concept of using a crochet-covered can for a hook holder/organizer and I thought I'd give it a "whirl" (sorry, I couldn't resist!). Anyway, I decided on a spiral design so that a person could put their smaller hooks near the middle and work outward as the hook sizes increase. For the can I just used a regular vegetable can, about 14.5 - 15.5 ounce size, cleaned with label removed. I used scrap sport weight yarn (although the pink had to be doubled) with an E hook. The nice thing about this design is that you could use a smaller or larger can, just make the initial spiral smaller or larger to fit the opening; the rest of the pattern would stay the same. I've always been in favor of flexible patterns, when possible! So without further ado, here is the pattern -

Whorled Crochet Hook Organizer  -  Skill level: Easy

Materials -
Vegetable can, cleaned and label removed
Scraps of sport-weight yarn (colors called A, B, and C)
Size E (3.5mm) crochet hook

Pattern -  Worked in the round with front side facing you at all times.

1. With A, create a magic circle, ch 1. In the circle work 1 sc, 1 hdc, and 2 dc. Do not finish off.

2. With B, attach yarn to circle and work 1 sc, 1 hdc, and 2 dc. Do not finish off. Repeat with C.

                                   Instructions 1 and 2. Yarns knotted on right side are just the tails.
3. Tighten magic circle. With A, work 2 dc in each stitch of color B. With B, work 2 dc in each stitch of color C. With C, work 2 dc in each stitch of color A (8 dc of each color). You will continue to work the colors over one another till the end of the crochet piece.

                                   Progression of spiral

4. Continue working 2 dc in each stitch until you have a total of 14 dc of each color.

5. Work 1 dc in each of the next 15 stitches with each color.

                                  Spiral after Instruction 5.

6. Now begin working 1 hdc in each stitch around with each color. You won't do any increases from this point on; this is the part of the crochet that will slip over the sides of the can - it will fit snug.

                                   Hdc's fitting over side of can.

                                           Crochet over can.

7. Continue working the hdc spiral until it just comes over the edge of the bottom of the can. Finish off two of the colors. Leaving a long tail with the third color, whip-stitch around each hdc and pull to tighten every few stitches. The piece should fit tautly over the can; finish off.


                                  Instruction 7 completed.


 8. Ta-Da!


                                               Fini!

Just a couple more thoughts. If you want to make sure your hooks stay upright, putting some scrap yarn in the can to act as a cage style of "frog" device could work well.  Also, this pattern won't work with hooks that have comfort grip handles (Clover, etc.) or even smaller thumb-hold type padding because 1) the spaces in the crochet aren't large enough to accommodate the extra bulk, and 2) the hooks don't slide in/out well because the padding hangs up on the yarn. But if you're like me and have a bunch of the good 'ol aluminum hooks, this is the organizer for you!

Thursday, November 30, 2017

Bitten by the Bauble Bug

I've had a cold for the past week, so I've been spending quite a bit of time sailing the internet - and oh! those wonderful holiday patterns. Of all the lovelies that are out there, though, I have become totally enchanted with the Christmas Bauble - and what's not to love? You can get very inexpensive ball ornaments from the dollar store (I bought a package of a dozen for $1) plus you use your yarn scraps to crochet over them, then you have a very pretty ornament when finished. Win-win-win!

I looked up patterns for baubles (hoping to not have to reinvent the wheel), but the majority I found used larger balls and heavier weight yarn. So I had no choice but to create the Corded Bauble - and keeping with the Christmas spirit, I am sharing it with you! I know many of you don't use size 10 or 5 crochet thread, but being a lace-lover I do have quite a bit of these in my stash so that's what I used.
Color variations of the Corded Bauble

Materials - 1 7/8" (48mm) plastic ball ornaments (I had red but gold or silver would fine)
Cotton Crochet Thread size 10 in different colors
Bernat Handicrafter Acrylic Thread size 5 in different colors
Size 1.9mm hook, but you could probably use a 2mm or a 1.8mm
Liquid Stitch or equivalent (white glue would work)
Scissors
Stitches -  sp - Space,  st - Stitch,  sl st - Slip Stitch,  ch - Chain,  dc - Double Crochet,  trc - Triple Crochet,  fptrc - Front Post Triple Crochet,  mc - Magic Circle,  v-st - V-Stitch (dc, ch 1, dc), 2-dc group - 2 dc's worked in same stitch,  FO - finish off.
Special Notes - 1. All rounds are worked from the front (right) side. 2. All rounds are finished off to use a new color for the next round. 3. Instead of trying to weave in ends, I took the beginning and ending tails of each row and weave them so they're next to one another, put Liquid Stitch on the base of each, tied an overhand knot and let them dry.
1. With a mc, ch 3 (1st dc) and work 11 dc's in the circle. Sl St in top of ch 3, tighten circle and FO. (12 dcs).

2. Work 2 dc's in between each dc from round 1. FO. (12 2-dc groups made)

3. Work 1 V-st in the middle of each 2-dc group from round 2. FO. (12 V-sts)

4. *Work 2-dc group in V-st from round 3; trc in front of round 3, in between the 2-dc groups from round 2*. Repeat * to * around. FO.

5. Work V-st between each 2-dc group from round 4. FO.

6. *Work V-st in the ch 1 sp of the V-st from round 5; working in front of round 5, fptrc around the trc from round 4*. Repeat * to * around. FO.

7. Work V-st in the ch 1 sp of V-st from round 6. FO.

8. *Work V-st in the ch 1 sp of the V-st from round 7; working in front of round 7, fptrc around the fptrc from round 6*. Repeat * to * around. FO.

9. Work V-st in the ch 1 sp of V-st from round 8. Slip ball into crochet and finish round with ball inside. You'll work crochet rounds over ball from this point on.

10. *Work V-st in the ch 1 sp of the V-st from round 9; working in front of round 9, fptrc around the fptrc from round 8*. Repeat * to * around. FO.

11. Work 2-dc group in ch 1 sp from round 10 around. FO.

12. *Work 1 dc between the 2-dc group from round 11; working in front of round 11, fptrc around the fptrc from round 10*. Repeat * to * around. FO.

13. Work sc in every other st around, FO.


Note - If you use all size 10 crochet thread, you may need to add another round before you complete the bauble with round 13. If so, work 1 front post double crochet in every fptrc from round 12.

A couple other baubles I made. Loved the look of the Fptrc stitch, so I went crazy with it!
The entire dozen baubles completed!

I hope you enjoyed this little tutorial and it has encouraged you to create a few baubles of your own this season!


Monday, November 20, 2017

Blueberry Hill Cowl

As I mentioned in a previous post (here), I was very busy during and right after the visit with my Mom. My sister-in-law informed me that she had accidentally lost a cowl I had made for her a few years back and she wanted me to make her another (complete with taking me to a yarn store!). It was with a very heavy heart that I had to decline her generous offer, but I was in the process of crocheting a wrap for her daughter and wouldn't have time to do both on my visit.

After I returned, however, was another matter. My S-I-L requested purple to go with her purple winter coat, and I recalled two purple and two blue skeins of acrylic chenille I bought from Herrschner's a while back - I have decided to work down some of my stash, after all. So, voila, the Blueberry Hill Cowl was born! I realize that the chenille yarn I used has been long discontinued, but I believe any #4 weight yarn could be substituted.

I wanted to make the cowl thick enough so that it could work her warm in those cold Chicago winters, but I did discover that making a more solid fabric made it resistant to folding. So I kept a space between the "berries" and just hope they don't let in too much cold air.


 When my S-I-L received the cowl, she said it coordinated well with her coat and she was sure it would be nice and warm. Success! If you would like to get the free pattern, it is available in my store on Bonanza, here.

Saturday, September 9, 2017

It's National Teddy Bear Day!

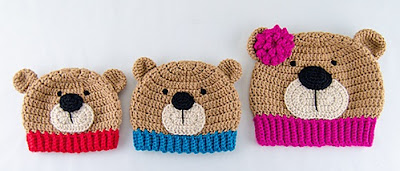
We love teddy bears. I don't believe I have ever known someone who didn't at least like teddies, and many people had one as a "best friend" as a child (me included!). Ever since the shopkeeper Morris Michtom and his wife Rose made a stuffed fabric bear in honor of America’s 26th commander-in-chief (Teddy Roosevelt) and displayed it with a sign, “Teddy’s bear,” in their store window, these bears have been a perennial favorite. So in honor of this beloved creature that has given us so much comfort, let the love begin!
Have you ever seen such a sweet face?!!

Gorgeous free-form teddy by Irina Iriss, at
What a delightful way to stay warm! Pattern for sale by Carolina Guzman at

Such little cuties! Free pattern available at https://amigurumi.today/amigurumi-teddy-bear-brothers-in-sweaters-free-crochet-pattern/                        
Fuzzy Wuzzy was a bear...and the free pattern is

Aren't these booties adorable? Free pattern from Helena Asmu Lim at http://www.clearlyhelena.com/teddy-bear-booties/


Sweetness overload!

What child wouldn't go to sleep with these friends? By Christins from Sweet Potato 3 at

My childhood teddy was a panda bear! Designed by

What lucky mother wouldn't want to receive this beauty for her newborn?Teddy

There's even a Halloween Teddy - Frankie the Zombie Teddy by Krawka at
                                                                                                                            
(I have to admit that there were so many teddies and teddy-related items that it was really difficult to decide what to include in this post. Trust me, this is only a fraction of what I found on Pinterest!)

Wednesday, August 16, 2017

The Dog Days of Summer

I remember as a kid I would kind of dread August. First it meant that I only had one month of summer vacation left before school started (in Chicago school starts the day after Labor Day). But second, August usually had the worst weeks of summer heat, and without any AC it generally meant I spent a whole lot of time in the basement, or when I could, at the local public swimming pool.

Now that I'm into crochet, however, "dog days" has an entirely different meaning. So in honor of National Dog Day being on 8/26, I will devote this blog entry to our four-pawed, tail-wagging, tongue-drooling best friends, and to all the wonderful crochet they inspire us to create!

I couldn't resist! This Schnauzer puppy reminds me so much of my own Mickey! Inspiration only by Lemowan - https://www.instagram.com/p/BCptrRojjqM/

Adorable hats for kids (or the young at heart!) Free pattern at http://www.repeatcrafterme.com/2014/01/crochet-dalmatian-dog-pattern.html

Moss the Puppy Dog pattern for sale at http://www.amigurumipatterns.net/shop/Patchwork-Moose/Moss-the-Puppy-dog/

Cute dog bowl mat by Bauta Witch, free pattern with translating on page - https://bautawitch.se/2015/12/14/diy-virkad-matskalsmatta-till-din-hund/

Remember the Slinky Dog? Here's the crocheted version, but will need translating - http://stranamasterov.ru/node/105178

Exquisite hound dog, inspiration only by amiguru_mi --https://www.instagram.com/p/9_comrlFrQ/

Wonderful dog toy bones, free pattern by Lime Green Lady - https://limegreenlady.wordpress.com/2014/01/27/23/

Pretty in pink Pomp-a-Poodle by Red Heart - free pattern at http://www.redheart.com/free-patterns/pomp-poodle

These dog-face cup cozies are just fantastic! Created by HookedbyAngel, you can buy the patterns on Ravelry http://www.ravelry.com/designers/hookedbyangel  or her shop - https://www.etsy.com/shop/HookedbyAngel?ref=l2-shopheader-name&section_id=16355592

And now, from the "Waaay Back" machine, it's none other than Mr. Peabody from "Mr. Peabody and Sherman" (there is a new cartoon version out!) Free pattern available from K. Godinez at http://www.ravelry.com/patterns/library/mr-peabody

Ah, yes - the iconic dog sweater! Above is actually an adorable hoodie from Jenna Wingate at http://www.ravelry.com/patterns/library/dog-hoodie

Of course we can't forget one of the most famous dogs! Snoopy with his friend Woodstock - https://www.craftster.org/forum/index.php?topic=424990.msg5057883#msg5057883    I couldn't find the photo's pattern, but this very close version is for sale by Amanda L. GirĂ£o: http://www.ravelry.com/patterns/library/snoopy-inspired-dog-amigurumi   
 As always, all photos have been procured from Pinterest, and I try my best to link to the original designer. I will be glad to post any corrections in future posts, if necessary.

Sunday, May 14, 2017

Mother's Day Flop

About a month ago I found a beautiful Ice yarn, Air Baby Alpaca. It's a mix of alpaca, extrafine merino wool, viscose, and polyamide, and it's so soft. It has been made into a chain, and since I've enjoyed working with other chained yarns, I decided to try it. Plus it came in a very pretty shell pink (pink with an undertone of peach) that would look really good on my mom. 

I wanted to make a shawlette for my mom - just a little something to go over her shoulders without being cumbersome or heavy. I found the Dawn in the Woods Shawl by Elaine Phillips (http://www.ravelry.com/patterns/library/dawn-in-the-woods-shawl) which was perfect because the length.can be adjusted. I was set!
While I was working on the last third of the shawlette I realized that it wasn't going to be symmetrical. This bothered my sense of design balance (possibly a little OCD?) but my real problem was that when I tried it on it really looked "old lady-ish". My mom's style is more like Olivia's in 'Scandal', not the Victorian lacy look, so I came to the realization this would be all wrong for her. I have come up with a Plan B, but this will have to be for her birthday because I ran out of time for Mother's Day! Amazingly (or maybe not), the shawl ended up looking MUCH better on the dress form - 


So instead of this shawlette, I decided to fall back on an old standby - pigs. My mom has a wonderful collection, mostly figurines, and told the family years ago to not give her any more pigs. I have chosen to completely ignore this directive. Hence, behold the sweet little piggy bookmark (pattern from Ashlea Konecny at http://www.ravelry.com/patterns/library/pig-bookmark) - 
                                                         
    
 I also found a very unique present at Faerie Magazine that I thought my mom would like - Flying Prayer/Wish Paper (https://www.faeriemag.com/products/flying-wish-paper-mini-wishing-kit-dandelion-prayer). You write your wish on the paper, roll it up, put it on the platform card, and light it on fire. At the last moment "your wish magically lifts off the platform and rises to the heavens!". How cool is that!

Happy Mother's Day, Mom - And to all of those wonderful mothers out there! We deserve it!