Saturday, December 23, 2017

Happy Holidays!

To all my wonderful followers and those people who visit one of my social sites throughout the year, I thank you for all your attention to and well-wishes for my efforts. All of you are the reason I'm still plugging along!

I hope you all had a wonderful year and wish you and yours the best that this holiday season can give, and sincerely hope for all good things for you in the year to come.

MERRY CHRISTMAS AND HAPPY NEW YEAR from The Crocheted Butterfly.....and Arthur -

Bwaaahh-ha-ha-haa!! Ooh, um, er...cough, cough - I mean Ho! Ho! Ho! and Meeerrry Christmas!!

Sunday, December 10, 2017

Not What You'd Expect

Normally I'd have a post with some wonderful photos of inspiration or links to patterns, especially for the holiday season. However, it seems that there is an overload of those types of posts, so I decided to do something a little different.

I have owned a small plastic semi-articulated skeleton for probably going on twenty years. He isn't anything super special, but I like him. (So does my oldest son. At one point we even had an argument because my son said I had given the skeleton to him and I said I didn't. I won.)

Since this skeleton has been a part of my family for so long, naming him only seemed appropriate, and I feel that Arthur suits him. Arthur normally spends most of his time in a ziplock bag in the Halloween decorations box, but somehow since our move to CA (8 years ago), he managed to find his way to the back of the entertainment unit's cabinet. And people talk about the Elf on the Shelf! I've also thought it's only right that a few photographic portraits should be taken.

Arthur is a handsome devil, and always has such a wonderful smile!  
 Arthur normally comes out to decorate the entertainment unit in October, enjoying the company of a clay pumpkin made by my younger son's former high school sweetheart and an amigurumi pumpkin I made. But somehow Arthur always manages to stay out well past Thanksgiving and generally doesn't get back in the cabinet until Christmas is over.

 Arthur with his Halloween friends 
 One day my younger son's new girlfriend was over and she inquired about having a skeleton for a Christmas decoration. I explained that Arthur enjoyed the holidays, but I felt he should have some Christmas/winter accessories. So she suggested that I crochet something for him. Imagine that! So this year I've given him a little scarf and hat, and maybe next year he'll get a sweater or jacket.

 Arthur sporting his new Christmas duds. 

Arthur enjoying some Christmas Baubles I made - I think he's holding his favorite!
 As a matter of fact, there really isn't any reason Arthur couldn't stay out a little past Christmas. Wouldn't he be adorable as a Valentine's Day cupid? Or perhaps a new version of the Easter Bunny? By George, I may have caught on to something here, in a slightly twisted way. Oh, The Nightmare Before Christmas, what have you wrought?!!

Thursday, November 30, 2017

Bitten by the Bauble Bug

I've had a cold for the past week, so I've been spending quite a bit of time sailing the internet - and oh! those wonderful holiday patterns. Of all the lovelies that are out there, though, I have become totally enchanted with the Christmas Bauble - and what's not to love? You can get very inexpensive ball ornaments from the dollar store (I bought a package of a dozen for $1) plus you use your yarn scraps to crochet over them, then you have a very pretty ornament when finished. Win-win-win!

I looked up patterns for baubles (hoping to not have to reinvent the wheel), but the majority I found used larger balls and heavier weight yarn. So I had no choice but to create the Corded Bauble - and keeping with the Christmas spirit, I am sharing it with you! I know many of you don't use size 10 or 5 crochet thread, but being a lace-lover I do have quite a bit of these in my stash so that's what I used.
Color variations of the Corded Bauble

Materials - 1 7/8" (48mm) plastic ball ornaments (I had red but gold or silver would fine)
Cotton Crochet Thread size 10 in different colors
Bernat Handicrafter Acrylic Thread size 5 in different colors
Size 1.9mm hook, but you could probably use a 2mm or a 1.8mm
Liquid Stitch or equivalent (white glue would work)
Scissors
Stitches -  sp - Space,  st - Stitch,  sl st - Slip Stitch,  ch - Chain,  dc - Double Crochet,  trc - Triple Crochet,  fptrc - Front Post Triple Crochet,  mc - Magic Circle,  v-st - V-Stitch (dc, ch 1, dc), 2-dc group - 2 dc's worked in same stitch,  FO - finish off.
Special Notes - 1. All rounds are worked from the front (right) side. 2. All rounds are finished off to use a new color for the next round. 3. Instead of trying to weave in ends, I took the beginning and ending tails of each row and weave them so they're next to one another, put Liquid Stitch on the base of each, tied an overhand knot and let them dry.
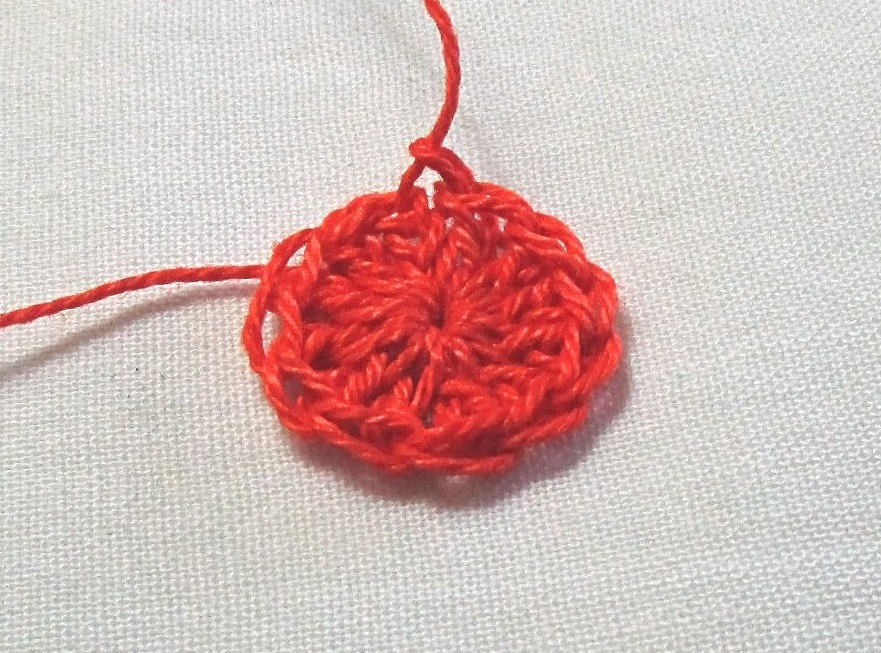
1. With a mc, ch 3 (1st dc) and work 11 dc's in the circle. Sl St in top of ch 3, tighten circle and FO. (12 dcs).

2. Work 2 dc's in between each dc from round 1. FO. (12 2-dc groups made)

3. Work 1 V-st in the middle of each 2-dc group from round 2. FO. (12 V-sts)

4. *Work 2-dc group in V-st from round 3; trc in front of round 3, in between the 2-dc groups from round 2*. Repeat * to * around. FO.

5. Work V-st between each 2-dc group from round 4. FO.

6. *Work V-st in the ch 1 sp of the V-st from round 5; working in front of round 5, fptrc around the trc from round 4*. Repeat * to * around. FO.

7. Work V-st in the ch 1 sp of V-st from round 6. FO.

8. *Work V-st in the ch 1 sp of the V-st from round 7; working in front of round 7, fptrc around the fptrc from round 6*. Repeat * to * around. FO.

9. Work V-st in the ch 1 sp of V-st from round 8. Slip ball into crochet and finish round with ball inside. You'll work crochet rounds over ball from this point on.

10. *Work V-st in the ch 1 sp of the V-st from round 9; working in front of round 9, fptrc around the fptrc from round 8*. Repeat * to * around. FO.

11. Work 2-dc group in ch 1 sp from round 10 around. FO.

12. *Work 1 dc between the 2-dc group from round 11; working in front of round 11, fptrc around the fptrc from round 10*. Repeat * to * around. FO.

13. Work sc in every other st around, FO.


Note - If you use all size 10 crochet thread, you may need to add another round before you complete the bauble with round 13. If so, work 1 front post double crochet in every fptrc from round 12.

A couple other baubles I made. Loved the look of the Fptrc stitch, so I went crazy with it!
The entire dozen baubles completed!

I hope you enjoyed this little tutorial and it has encouraged you to create a few baubles of your own this season!




Monday, November 20, 2017

Blueberry Hill Cowl

As I mentioned in a previous post (here), I was very busy during and right after the visit with my Mom. My sister-in-law informed me that she had accidentally lost a cowl I had made for her a few years back and she wanted me to make her another (complete with taking me to a yarn store!). It was with a very heavy heart that I had to decline her generous offer, but I was in the process of crocheting a wrap for her daughter and wouldn't have time to do both on my visit.

After I returned, however, was another matter. My S-I-L requested purple to go with her purple winter coat, and I recalled two purple and two blue skeins of acrylic chenille I bought from Herrschner's a while back - I have decided to work down some of my stash, after all. So, voila, the Blueberry Hill Cowl was born! I realize that the chenille yarn I used has been long discontinued, but I believe any #4 weight yarn could be substituted.

I wanted to make the cowl thick enough so that it could work her warm in those cold Chicago winters, but I did discover that making a more solid fabric made it resistant to folding. So I kept a space between the "berries" and just hope they don't let in too much cold air.


 When my S-I-L received the cowl, she said it coordinated well with her coat and she was sure it would be nice and warm. Success! If you would like to get the free pattern, it is available in my store on Bonanza, here.

Saturday, November 11, 2017

It's Turkey Time!

Now that we've all settled ourselves from our Halloween-induced sugar highs, it is time to turn our thoughts to that most delicious of holidays, Thanksgiving.  As MentalFloss.com states, "Since [William] Bradford wrote of how the colonists had hunted wild turkeys during the autumn of 1621 and since turkey is a uniquely American (and scrumptious) bird, it gained traction as the Thanksgiving meal of choice for Americans after Lincoln declared Thanksgiving a national holiday in 1863." So I think it only fitting that we pay crocheted homage to a creature that has brought so many of us such aromatic and savory memories - I give you...the Turkey!

He looks a little scrawny, so maybe he should be pardoned by the President! Theo the Turkey paid pattern by ILDikko at http://www.amigurumipatterns.net/shop/IlDikko/Theo-the-Turkey/

Adorable Turkey Hat by The Stitchin' Mommy, free pattern at https://www.thestitchinmommy.com/2014/11/crochet-turkey-hat-free-pattern.html

Cute Turkey (I'll say!) by Teri Crews, free pattern at Ravelry - https://www.ravelry.com/patterns/library/cute-turkey

Delightful pillow Turkey Graph CAL by Emily from Pixel Perfect -free pattern at https://www.pixelperfectcrochet.com/turkey-crochet-graph/#more-1917

So adorable Turkey Coasters by Joanne at Craft Passion, free pattern at http://www.craftpassion.com/crochet-turkey-coasters-and-ornaments/

Beautiful autumnal colors and line dancing turkeys come with this Turkey Talk Throw from Red Heart, free pattern at http://www.redheart.com/free-patterns/turkey-talk-throw#.UGL6ycCoKFo.pinterest

Pilgrim Turkey is all dressed up for dinner! Only $2.69 for this pattern at https://www.e-patternscentral.com/detail.html?code=ENC0186&source=pntrste

No Thanksgiving dinner would be complete without a nice big piece of pumpkin pie! Scrumptious Pumpkin Pie Brooch/Tissue Holder free pattern by Twinkie Chan at http://blog.twinkiechan.com/2014/11/26/free-crochet-pattern-video-tutorial-pumpkin-pie-brooch-and-tissue-holder/  
 I hope you all have a wonderful and bountiful Thanksgiving holiday surrounded by your friends and loved ones!